
Practice, practice, practice!
The biggest challenge is staying in sync with all of the other singers who are not around you as when you usually rehearse or perform with them. Watch the director carefully and pay attention to the timing of your respective vocal part in the guide video. Learn to anticipate the attack of a note and the release of a hold. Practice over and over until you are able to closely match your voice part from the guide-video or learning tracks (depending on the project).
How to record your performance
You don’t need special equipment, software, microphones or anything else. You can use any camera capable of recording audio and video, even your phone or webcam. Just record yourself singing along with the guide video, upload your video using the form on your project’s webpage, and we will take it from there.
Follow the tips below, practice several times to get your timing synced with the director (since you are not performing together at the same time/space) or the guide-track then go for it!
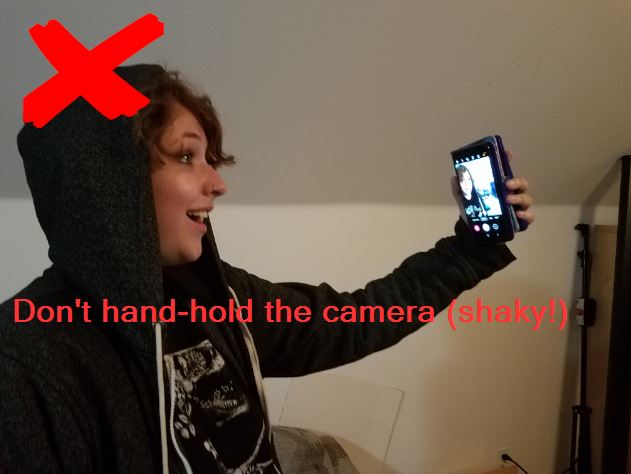
Using your camera or phone on a tripod or securely positioned at just below head-height, listen to the accompaniment track on earbuds while you record yourself singing. Don’t forget to keep still and recording all the way to the end after the last note (there will be titles to prompt you, if the device playing the guide track is visible in front of you).
Record as many times as needed until you are happy with your performance, then upload it using the form on your project’s webpage.
This video demonstrates how to record and upload directly from most smartphones. (From another “virtual” singing project, adapted for this recital.)
Tips for making your best recording
Here are several tips and tricks to get the best recording. Please read them and follow to your best ability. Most important, experiment, try different things until you like the result, and have fun!
- If you are not “tech-savvy” don’t worry. We have done this with dozens of virtual singers. The simplest way is for you to RECORD your performance on one device, such as a phone or webcam, while you LISTEN and/or VIEW the accompaniment on a separate device, such as a computer monitor or tablet, listening to the audio of that device on earbuds.
- It is very important that the sound from the guide track does not “bleed” into the recording of your voice, so do not listen through loudspeakers while you record, only earbuds or headphones.
- Practice singing with the guide-video or learning track several times to get your timing and tuning aligned with the the director (or track) and the singers of your voice part.
- Choose an indoor recording location without extra noises such as TVs, appliances, fans, pets, people, etc. Rooms with mostly hard or smooth walls and surfaces (like bathrooms) should be avoided as the reflections (reverb) will impact the sound. Hanging heavy blankets on opposing walls can help if this is your only choice.
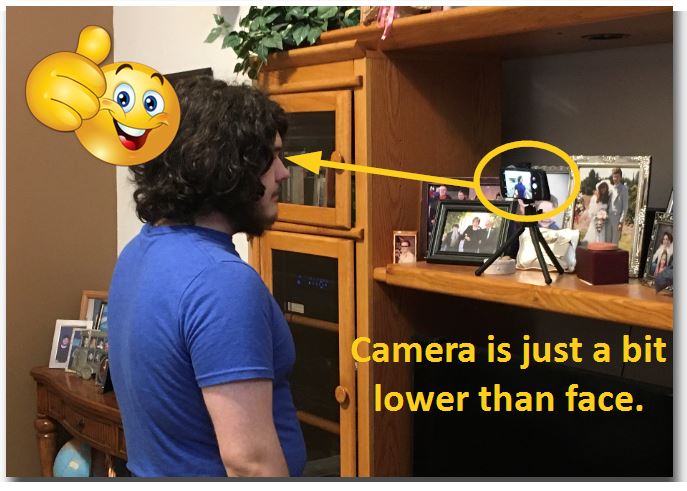
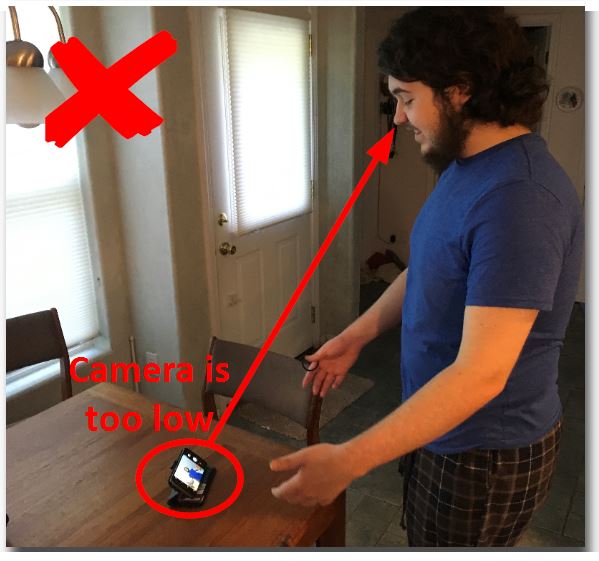
- Position your camera/phone level with or just lower than your face while you are singing. Use a tripod or secure it on a shelf, cabinet, dresser, or whatever works so you can maintain your singing posture. You should not be looking down at a laptop or table. A low-angle camera view is not flattering, and you are singing to a virtual audience who would be in front of you, not below.
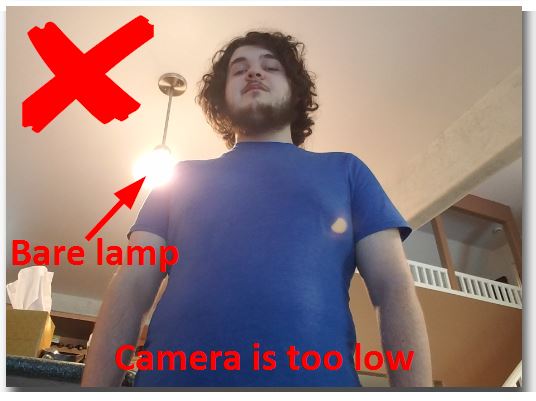
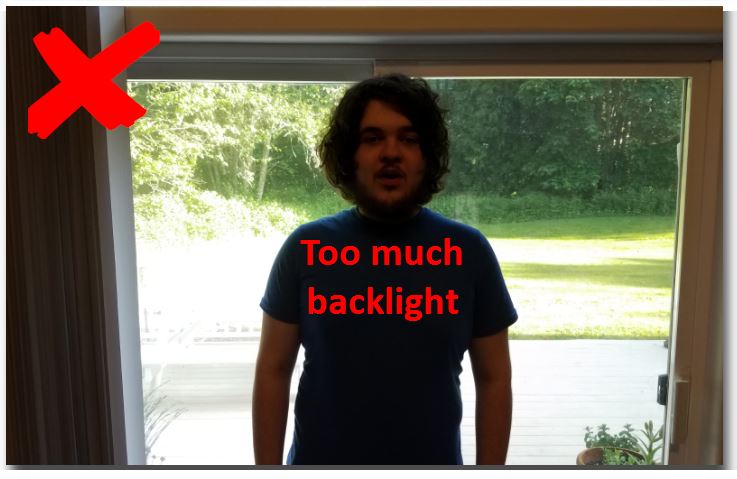
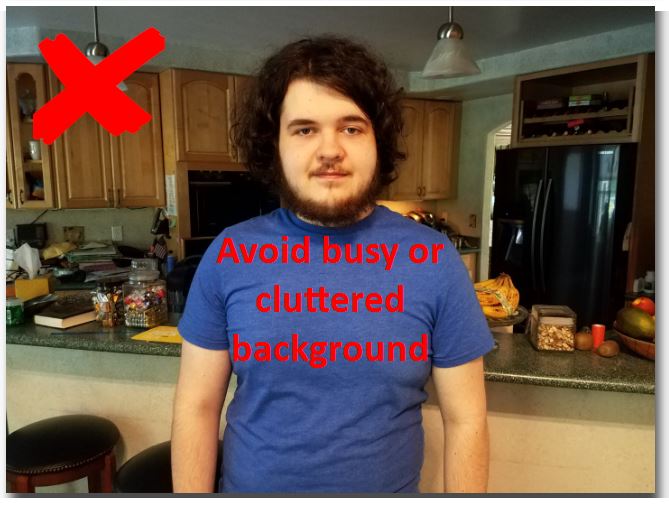
- Have more light in front of you than behind you. Avoid windows and bare lamps in the background or to the side, or the camera will auto-adjust darker and it will be harder to see you. Make sure the background is not too busy or cluttered, and there is nothing in the frame you don’t want others to see.
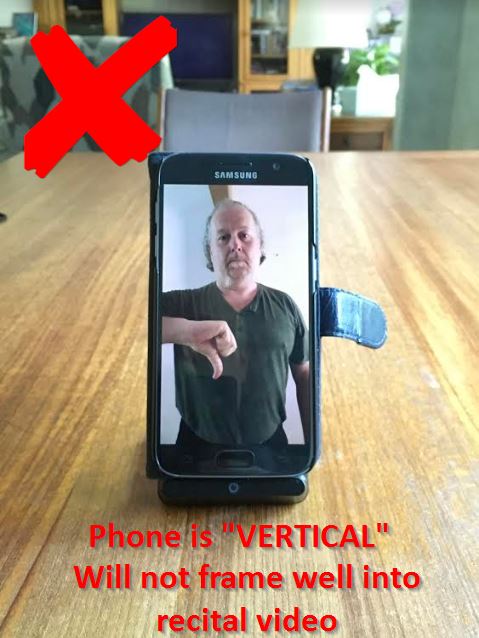
- (DIRECTOR AND SOLOISTS) If using a phone or tablet to record video, make sure it is in HORIZONTAL (“landscape”) orientation, like a TV screen or computer monitor. Do not use it vertical like you might hold it while chatting with a friend. Vertical videos will not be usable for directors and soloists.
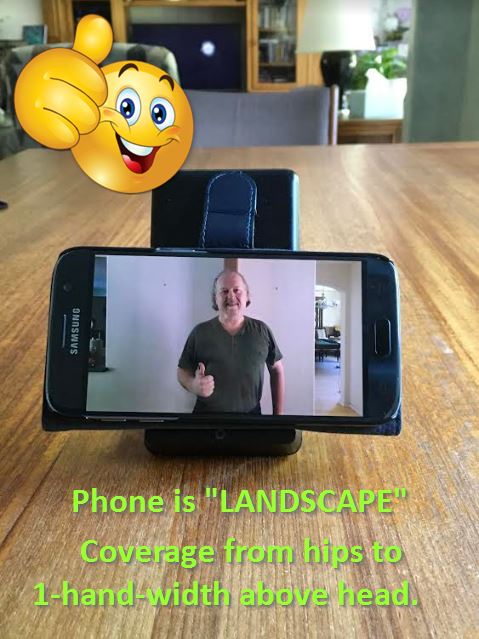
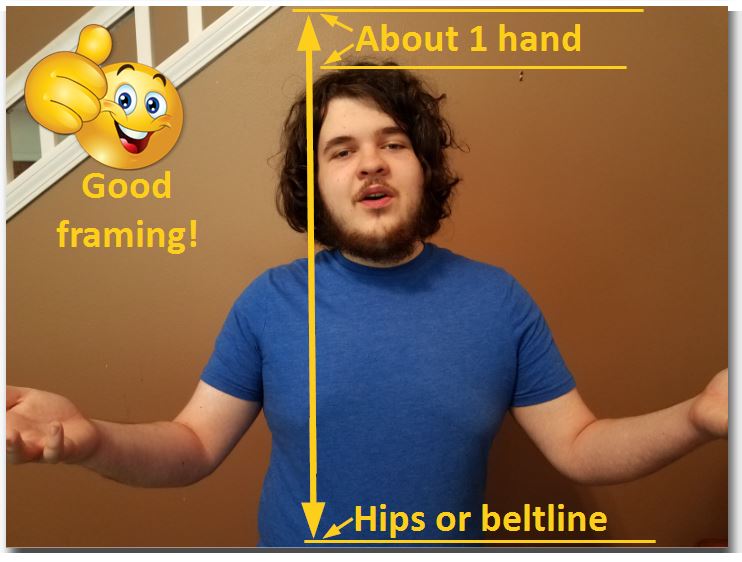
- (DIRECTOR AND SOLOISTS) Frame yourself so you are visible from the hips or belt to about a hand-width over your head. This gives you room for motion and puts you at an ideal distance from the built-in microphone for recording. If using a camera with a zoom lens, get closer to it instead of zooming in. Too far away (whole body) and the camera’s mic will pick up all of the room tone, echo, outside noises and more. Too close, and you might just be a big head in the frame while the sound distorts!
- (V-CHORUS INDIVIDUALS) Please record horizontal, like an ordinary camera or monitor would be! Vertical videos may not be usable. Frame your head and shoulders with plenty of space all around. Don’t get too close or some of your head might get cropped if you move around a little. Too far away, and the sound will not be good.


Final Important Reminders…
- Clean the camera lens! Otherwise you might look blurry or cloudy.
- Wear earbuds or headphones for the guide track to prevent bleed onto your recording.
- Start recording before you start playing the guide video. We need lead-in footage for sync.
- After the last note, continue recording until the guide video says to stop. We need lead-out to fade the video and capture room-tone for noise reduction.
- Use only the upload form for submitting your recording. Do not email or message (it’s too large!)
- Make sure you are on WiFi, not mobile data or it could timeout or fail (it’s a big file!).
- Have fun! Contact us if you are having difficulty with the process. (Don’t give up!)
Are you ready to record and upload?
Return to your project’s webpage. If you clicked a link on that page to get here, use the BACK button on your browser.